How to run a pre-determination check on a patient’s e-Claims coverage from the clinic view.
Telus Health eClaims allows you to save time by billing directly to supported third party insurance companies when checking out a treatment. Before you can use eClaims, you must first configure the Telus Health eClaims module. You can find a tutorial on how to do that here.
From time to time, you may wish to determine a patient’s level of coverage prior to submitting their claim. To do this, follow these steps:
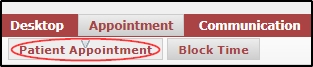
- Go to Patient > Appointment.
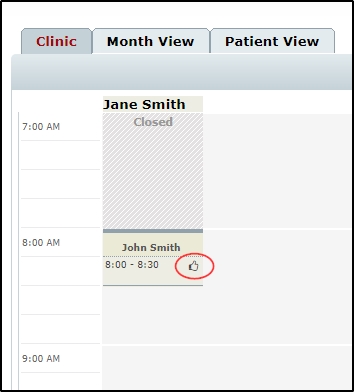
- In Today’s appointments, expand the drop down menu for the patient you wish to check and select the “PRED” icon.

NOTE: If you do not see the icon, please remember that predetermination requests can be run only on appointments for today’s date, and check that the patient has a claim created with an insurance provider who supports predetermination requests. (Some do not. You can find more information on that via the eClaims website FAQ, here.) You should also check our troubleshooting document here for a list of common reasons you may not be able to post an invoice to eClaims, as these issues will also affect predetermination requests.
- In the resulting pop-up, specify whether the claim is related to an accident and fill in details if necessary. Next, you can change payee if needed and specify which role to run the check with if you have more than one. When finished, just accept the terms and conditions before pressing submit.
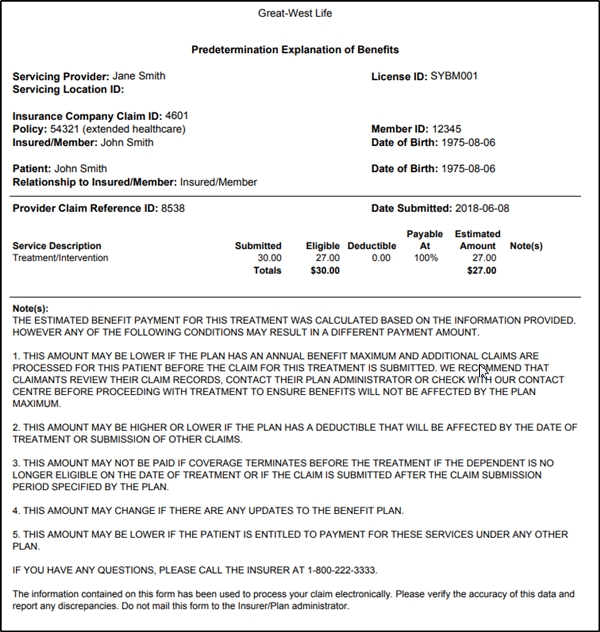
- Once the check is done processing, an EOB (explanation of benefits) should open up automatically, detailing the clients coverage.
- When you return to the calendar, you will notice a “Thumbs up” icon appears beside the appointment to indicate that predetermination was already run successfully on the appointment.