| To review the previous tutorial in this series, click here. To to back to the start of this series, click here. |
"WORKING WITH YOUR APPOINTMENT BOOK"
Welcome to the fifth tutorial in our “Getting Started” series.
In this tutorial, you will learn all about the Appointment Book.
There are three different ways for you to view your appointment book. You can change which of these views is your default view in your user settings. For more information on how to do that, click here.
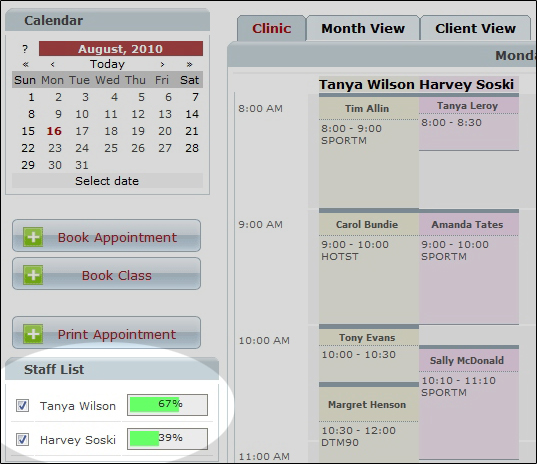
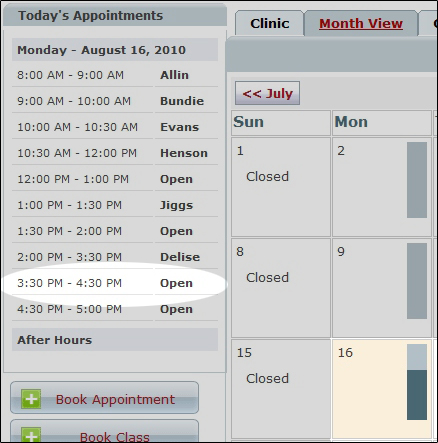
![]() - This is your daily schedule, showing all your appointments for the day. If you have more than one therapist in your clinic, their appointments will also appear here. If you would like to see the clinic view for another date you can navigate from day to day. Simply use the calendar on the left. To view the details of a particular appointment, click on the client's name in the appointment square.
- This is your daily schedule, showing all your appointments for the day. If you have more than one therapist in your clinic, their appointments will also appear here. If you would like to see the clinic view for another date you can navigate from day to day. Simply use the calendar on the left. To view the details of a particular appointment, click on the client's name in the appointment square.
![]()
Note: You may also show or hide other staff members using the checklist on the left. The checklist also displays a percentage bar, showing the availability remaining for each staff person.
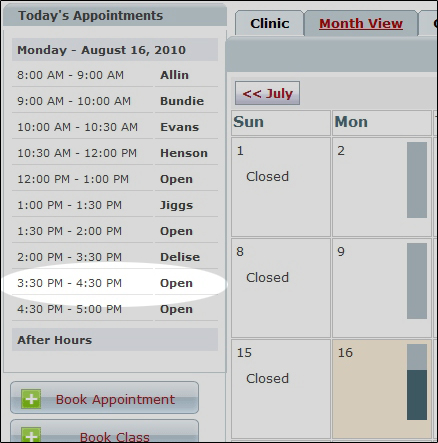
![]() - This tab reveals your calendar for the entire month.
- This tab reveals your calendar for the entire month.
The bar icons will give you a general indication of your availability for the day.
To book an appointment from the calendar, simply click on the date you are
interested in and select a time from the appointment list on the left.
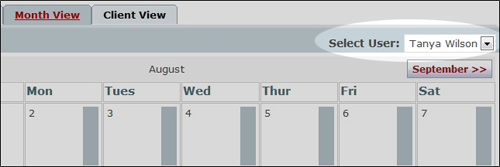
Note: To view the calendar for another staff person, simply use the drop down menu on the right.
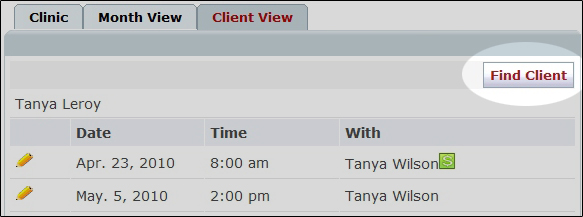
![]() - This tab will assist you in locating a client's appointment history. Simply click on the Find Client button
- This tab will assist you in locating a client's appointment history. Simply click on the Find Client button ![]() to open the history for that client.
to open the history for that client.
BOOKING APPOINTMENTS
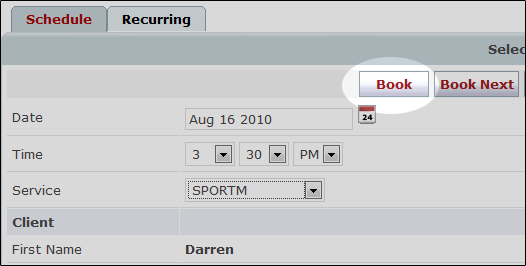
Single Appointments: (Note: For purposed of this discussion we are using the Month calendar view) To create a new appointment select a date from the calendar and choose a time from the availability menu on the left.
When you are finished filling out the appointment card, simply click the Book button ![]() .
.
For more information on booking appointments, visit our knowledgebase. How to Book Appointments from the Administration Area
Recurring Appointments: From a new appointment card, simply click on the Recurring tab ![]() to book a series of recurring appointments. For more information on how to do this, visit our knowledgebase.
to book a series of recurring appointments. For more information on how to do this, visit our knowledgebase.
How to book recurring or standing appointments
Note: When a client leaves the clinic, you may create an invoice for their appointment by loading that client's appointment card and clicking the Checkout button
![]()
For more information on how to do this, visit our knowledgebase.
Remember to visit our Support Center at www.mindzplaysupport.com if you need assistance.